How to Move Your Stove
A Homewood is a big item, too heavy to carry, and the prospect of moving your new stove through your house into position may seem a little daunting – take heart knowing that you need only do it once! It’s easier than you may imagine – armed with a plan and a little preparation you’ll complete it in less time than it takes to read this article. Mostly just done with levers and rollers, though if you have steps to navigate you’re going to be involving ramps as well.
Note: this is written using the Homewood Heritage as the example, but it all applies to the Homewood Matriarch as well (it’s just heavier and longer: but all the same levering techniques apply, just with an extra roller or two!). Almost all also applies to the Homewood Companion, with one major exception: the Companion (usually) comes on legs which mean you won’t be ever rolling just the stove itself, so you want to leave it on the pallet as long as possible – ideally until it is sitting on the pallet in front of the install location, then with the help of a few people, walk it off the pallet end at a time onto the hearth. Even without legs though, the Companion still isn’t suitable for rolling directly; it has different rail configurations – always keep it on the pallet until right in front of the installation!
As this article is long, it’s been broken it down into sections for you:
Before You Begin
Delivery: Door vs. Depot?
Getting it Inside Your Home
Final Positioning
Other Considerations
Before You Begin
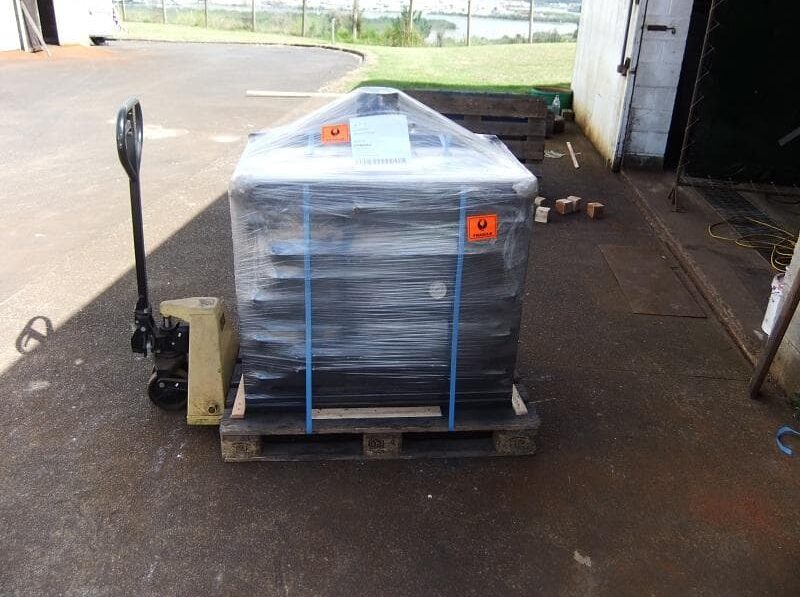
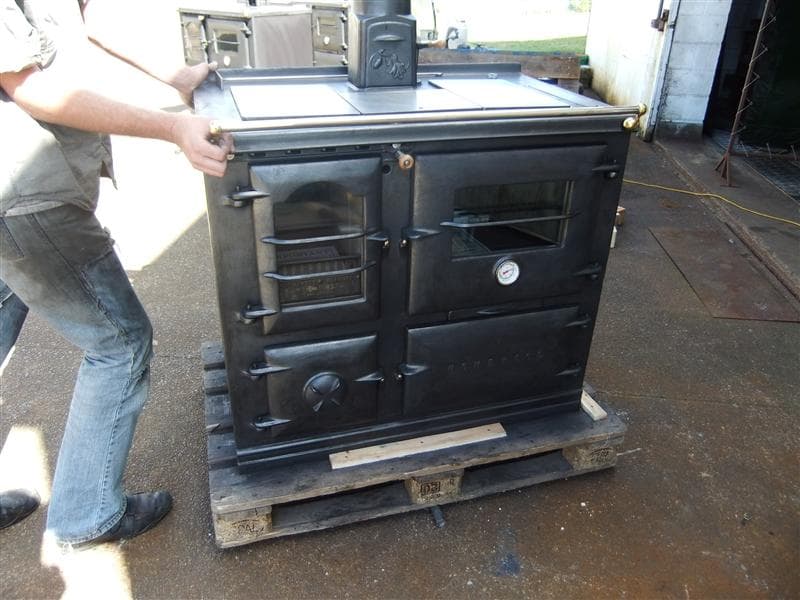
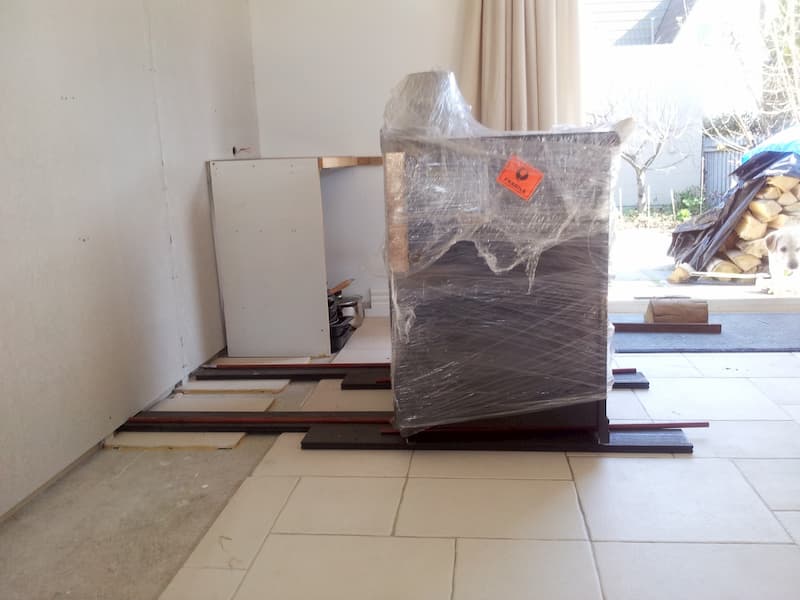
Your stove will arrive strapped to a pallet. It will be partially disassembled (flue collar, hand rail and top air control removed – reassembly instructions supplied) and be boxed with cardboard and/or plastic pallet wrap to help protect it in transit. If we’ve sent it to you internationally it will also be crated up with plywood, and we will have circled the screws you need to take out (#2 square drive) to uncrate.
All packaging is recyclable (break the pallet up for some good kindling – they’re all heat-treated!) and while if we’ve used any plastic wrap apparently that is is able to be recycled as well.
Key points:
– Strapped to a pallet, your Homewood Heritage weighs about 400 kg (Matriarch around 700 kg, and Companion around 300 kg) – you are not going to be carrying them anywhere!
– The pallets we use are generally 1200 long by 800 mm wide (Matriarch around 1750 mm long; still 800 mm wide)
– While still on the pallet, from the ground to the highest point of the stove is about 1050 mm (with flue collar detached)
– At present we use Mainfreight to get our stoves around the country, and we provide you with a Mainfreight tracking number
– Our packaging will do a bit to protect against minor moisture: but it is not 100% waterproof or intended to protect it from rain outdoors or anything like that
– While in transit or storage your stove is at its most vulnerable
– IF your stove is going to be sitting around for several days/weeks/months or more, unwrap it! Humidity depending, the cast iron can attract condensation, and the wrap could then act as a moisture trap. Throwing an old blanket over an unwrapped stove will serve you better; but better yet is to only have us deliver your stove once you’re ready to actually move it into place and install it!
Can’t stress this enough: it is really heavy, so don’t ever put yourself, or even part of yourself, beneath the Homewood – no matter the model.
Door vs. Depot?
You have a decision to make regarding delivery: the stove can be delivered to your door, or you can arrange to collect it from the nearest Mainfreight depot (or welcome to collect direct from our workshop, if you’re local enough). Weigh up the pros and cons, and let us know your choice before delivery.
Delivery to your door
Pros: the stove is right at your house!
Cons: Have to coordinate the delivery with a truck driver; sometimes significantly more expensive, especially where remote (we can provide comparative quotes); driveway needs good truck access; while the truck driver will unload the stove for you from the truck, they will only move it as far as the ground is flat and firm which can sometimes see it left in less-than-desirable places.
You will need: a driveway that can accommodate big trucks; somewhere firm and flat for the stove to be unloaded that doesn’t involve steps or ledges, but is dry, waterproof and accessible; to be at home when it arrives.
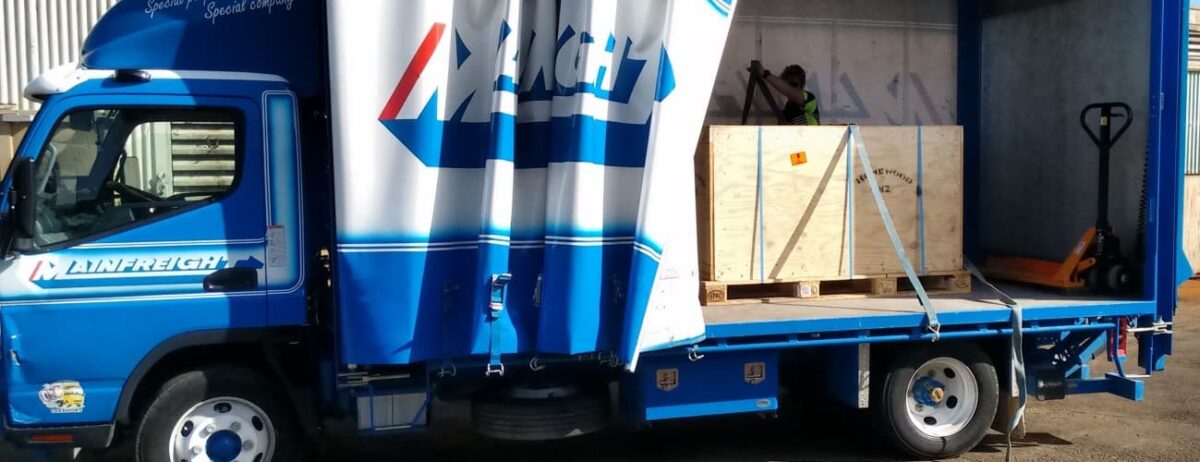
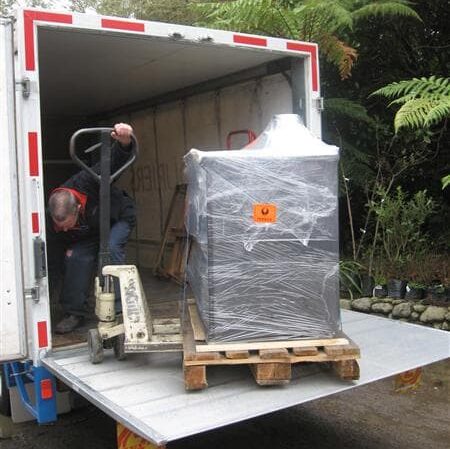
Generally, local delivery will be done in a medium-sized truck – smaller than large inter-city trucks that would struggle to fit down almost all driveways – but big enough to have a tail lift. Tail lifts are very important, as unless you have a forklift (or a tractor with forks – do let us know if you do!) your stove won’t be getting off the truck without a tail lift.
When the truck arrives, first show the driver where you would like the stove to end up. He’s not going to move it through your house for you (well, he just might if there’s great access already in place and he’s jolly nice and has the extra time), but it is in your best interests to get it put as close as possible to the door it will need to go through to get inside. Again: make sure that wherever you pick for them to put your stove is dry and waterproof and somewhere they can actually move it to. If you have nowhere waterproof and it’s not able to get shifted inside straight away: remove all the pallet wrap, chuck an old blanket over it and tie a tarp around it.
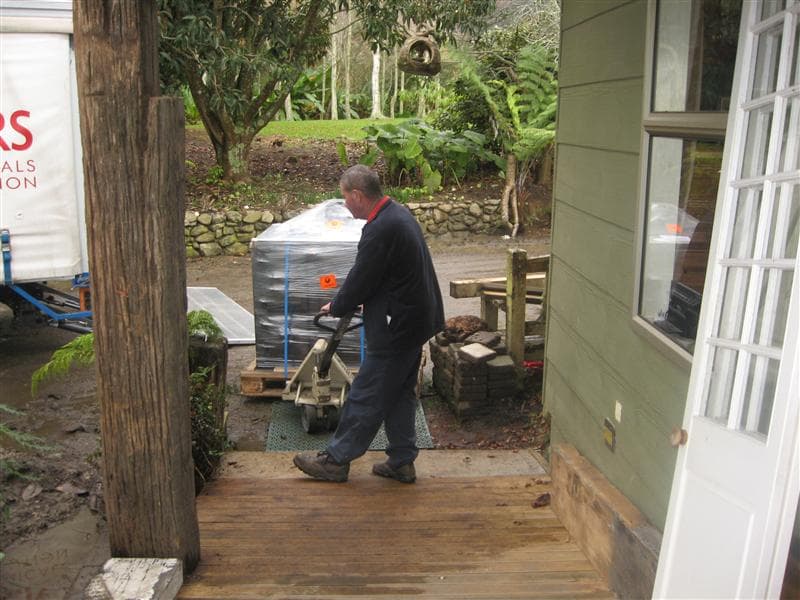
They’ll have a pallet jack – great for moving pallets around on hard, smooth surfaces, but not so great with gravel, grass, steps or ledges. They just want to get it off their truck and away to delivery the next thing as quickly as possible – respect their time and have worked out where being unloaded in advance.
After it has been unloaded, and before you sign for the stove, inspect for damage!
Ideally, you’ll unwrap it enough to be confident signing for it (driver will likely be impatient with you, but can just tell him you’re unwilling to sign for something as precious as this as being ‘Received in Good Order’ until you’ve actually checked that it is indeed in good order). If for any reason you can’t remove the packaging enough to get a proper look, please take photos of it with packaging still on, and get the driver to co-sign that you are accepting it subject to later unpacking (this may or may not count for anything, but is better than nothing). If there’s damage to the cardboard, tear it open more at that point and try see more, but the stove inside looks fine – still probably a good idea to get the driver to confirm the packaging damage, and get him to sign as ‘packaging damaged’ before you sign for it, just in case you have any unwanted surprises later.
Call us immediately (while the driver is still there) if there’s any issues whatsoever with the delivery – damage or otherwise!
Collecting from a depot

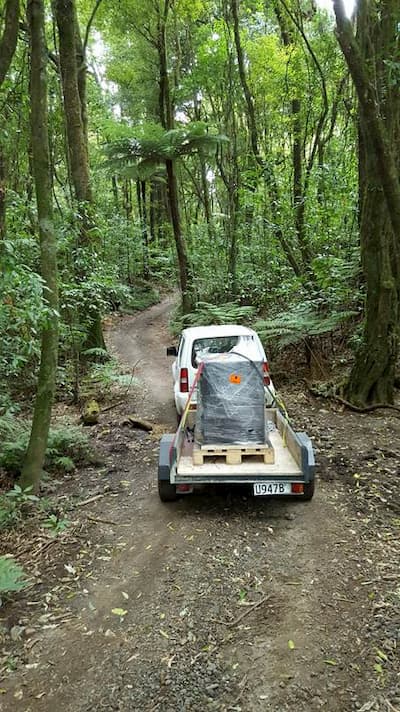
Pros: can collect at your own convenience (to a degree, they’re not a storage service: talking days not weeks here!); often significantly cheaper; some unloading situations may suit the stove already being on a trailer (where you’re going to be otherwise needing to ramp the stove up into your house or on to a deck, can be great to ramp straight down from a trailer or ute instead).
Cons: stove is not at your house; need a trailer; nearest depot to you might be a really long way away; still have to get it off the trailer at the other end.
You will need: access to a trailer, ute or equivalent; some strapping to secure it down with; waterproof coverings in case of adverse weather conditions. Oh, and be sure that your stove is actually available for collection! We’ll have supplied you with tracking, but don’t race off to pick it up immediately on seeing it ‘At Depot’ – they will give you a call once it is ready for collection (if you’ve seen it’s arrived, and they seem to be taking a while to get in touch with you, feel free to phone your local depot and check up, quoting your tracking number).
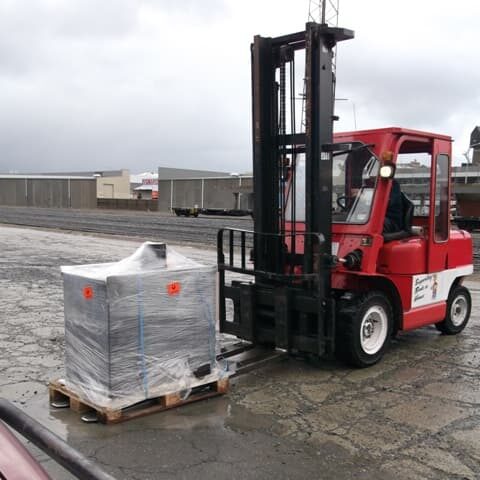
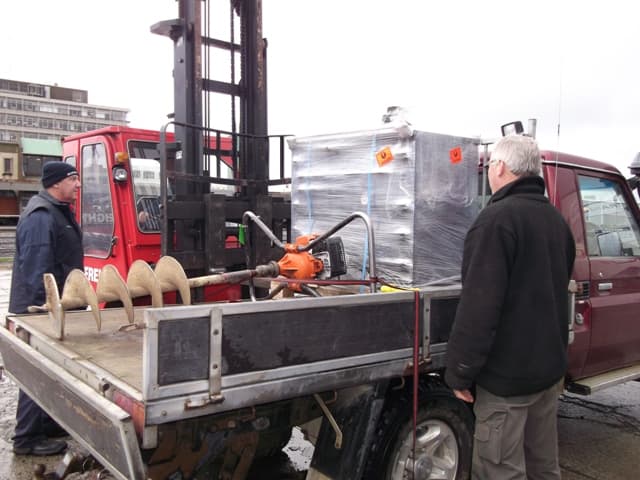
You must always first check in at your depot’s reception, even when you can see the stove sitting out in the freight bay. They’ll normally assign a forklift driver to you – who will direct you where to park and so on and will then simply lower the stove on your deck for you.
Secure it well before driving off (recommended: two trucker straps, one that goes around the stove and pulls it forward, the other that goes around and pulls it back), and make sure you use a rain cover if you have more than a short distance to go or the weather is looking dubious.
If you have any issues the friendly guys at Mainfreight ought to be able to sort you out. As always though, give us a ring right away if any kind of issue with collecting at the depot.
Inspecting for damage at the depot might be a bit trickier than receiving it at home, as you really don’t want to go unpackaging it until you’re all the way safely home! I suggest you take photos of it as is (wrapped) at the depot, and if there’s any damage to the packaging itself, tear that part up and take a look. If in any doubt, give us a call while you’re still at the depot and before signing for it.
Having the stove already elevated up on your tray or trailer will be handy once you’re home in situations where the stove was needing to go up anyway to get into a house with entrance steps or to be unloaded on a deck.
If you’re not immediately removing the stove from your trailer, make sure you park the trailer well under a carport or in a garage.
Getting it Inside Your Home
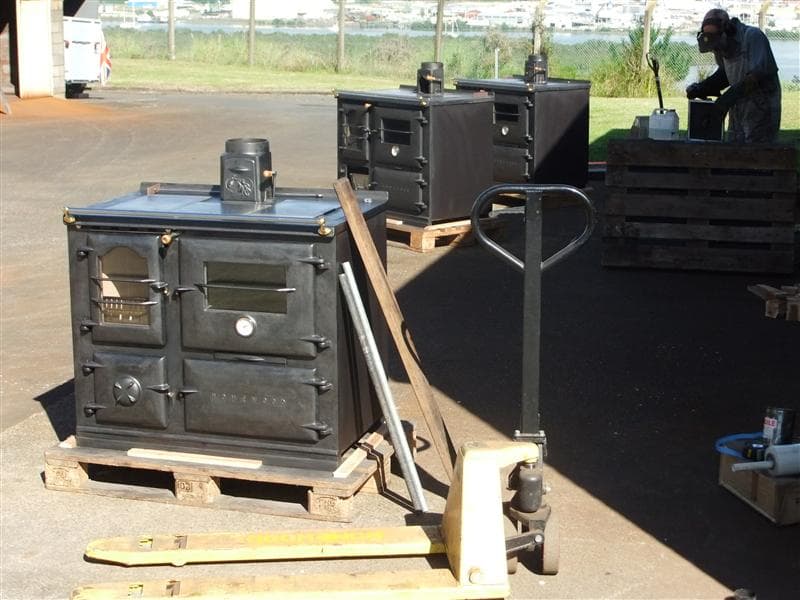
You now have your stove, sitting on the pallet ready to go into your house, either on the ground or sitting on your trailer.
You are not going to carry it inside (not even with lots of people! DON’T try) so without worrying ourselves too much about the physics of it all, now is the time to apply a bit of lever and roller know-how to overcome the massive weight.
“Give me a place to stand and a lever long enough and I will move the world”
Archimedes, 220 BC
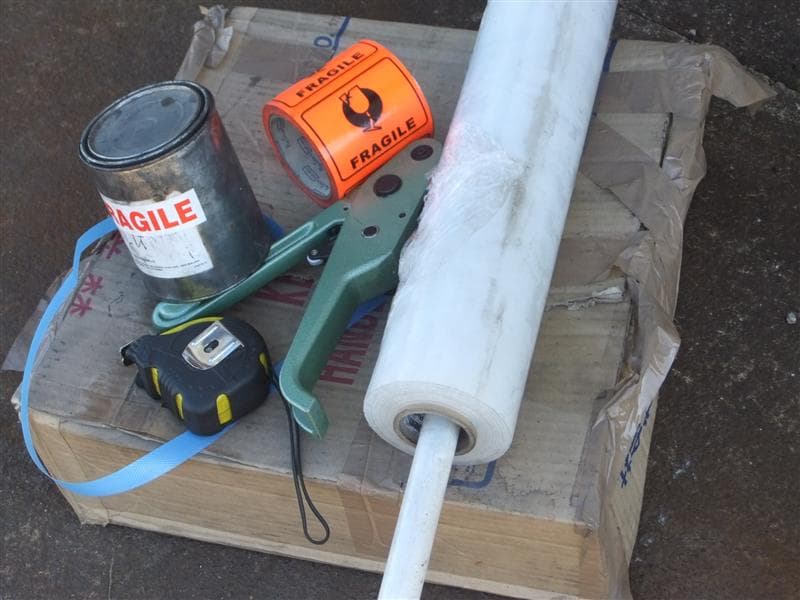
You will need: a good sturdy lever, a minimum of 2 rollers, 2 people (ideally), a bit of knowledge and a sound plan. You’re likely to also need a ramp, and some material to lay down to protect your floor.
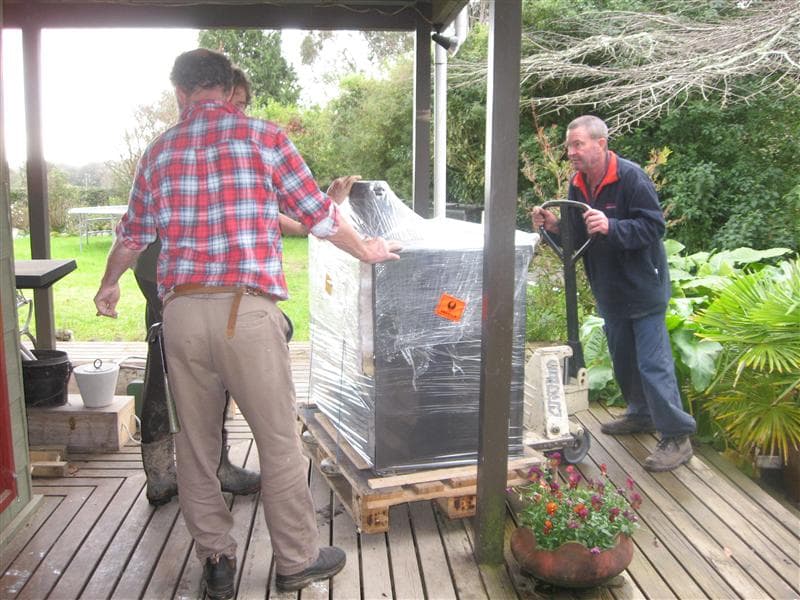
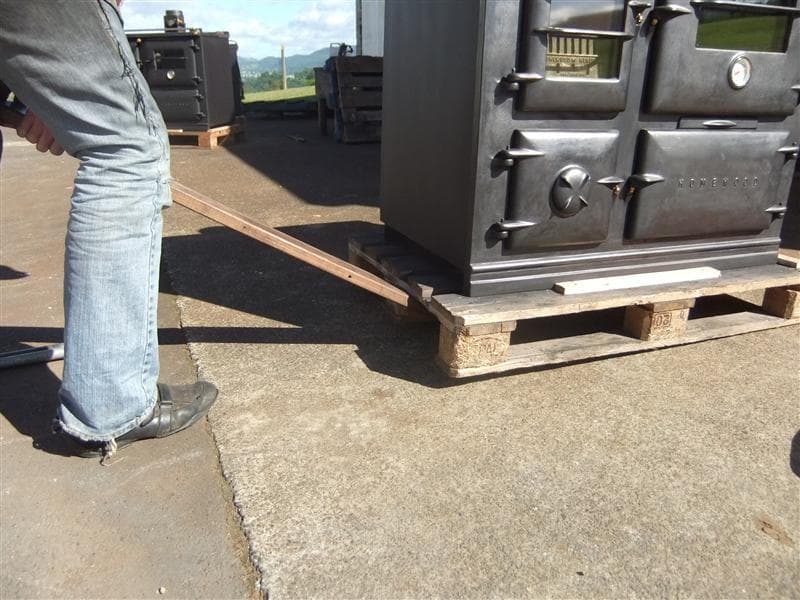
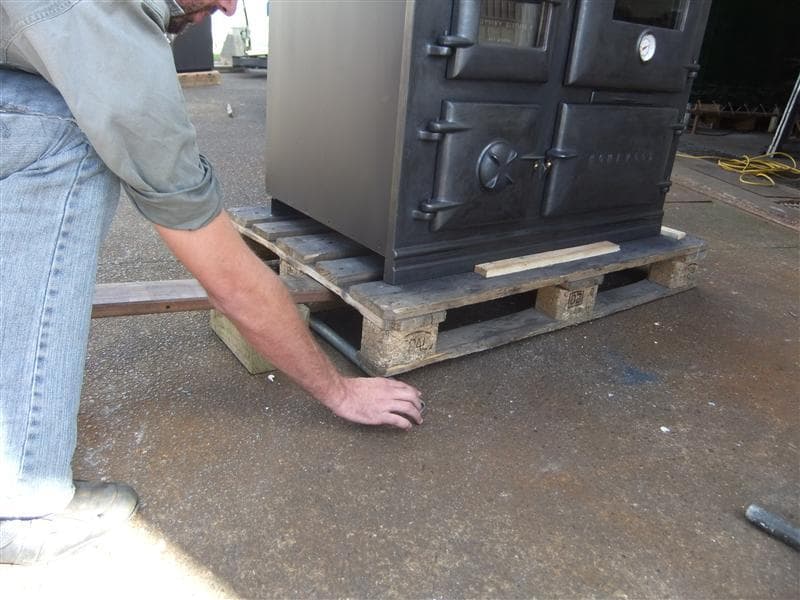
The basic principle for moving across level ground is that any time your stove (with or without the pallet) is sitting on at least one roller, a very small amount of constant pressure from behind will push it forward. Your lever makes it very easy to lift up the ends of your stove (or pallet) to slide rollers under. Lever up the end of the stove (or pallet) that is going to be leading and slide in a roller as close to the front as possible, then go lever up the other end – that upward pressure from behind will propel it forward.
Put your second (and third, if you have it) roller in the path out in front, so that when the stove reaches the point where the first roller is in the middle and begins to tip, it will lower onto the new roller(s) in front. As the stove leaves rollers behind just keep moving them back to the path in front until you have reached your destination.
With levering, always lever square off the stove (not on any weird or wild angles), with the lever located as centrally as possible and a decent way under, and with the fulcrum as close to the stove as possible, as in the images.
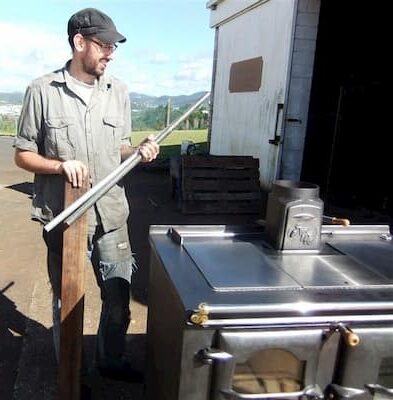
Lever & Fulcrum
A piece of hardwood will make the best lever, as hardwood has strength without undue thickness. Any piece of wood roughly the right size will function as your fulcrum. We’ve had great success with a lever of Indonesian Hardwood – slightly over 4″ by 1″ and about 4 feet long. 5 feet would be better: the longer the lever, the easier the work. If you’re using an iron bar instead of a wooden lever, just keep in mind it’s not distributing the load as nicely, so while you’re not going to cause any structural damage to the stove, you may put a minor dent into the outer casing (not a problem where the stove is being bricked in with sides hidden, or similar, but to be avoided where going to be left freestanding with sides exposed).
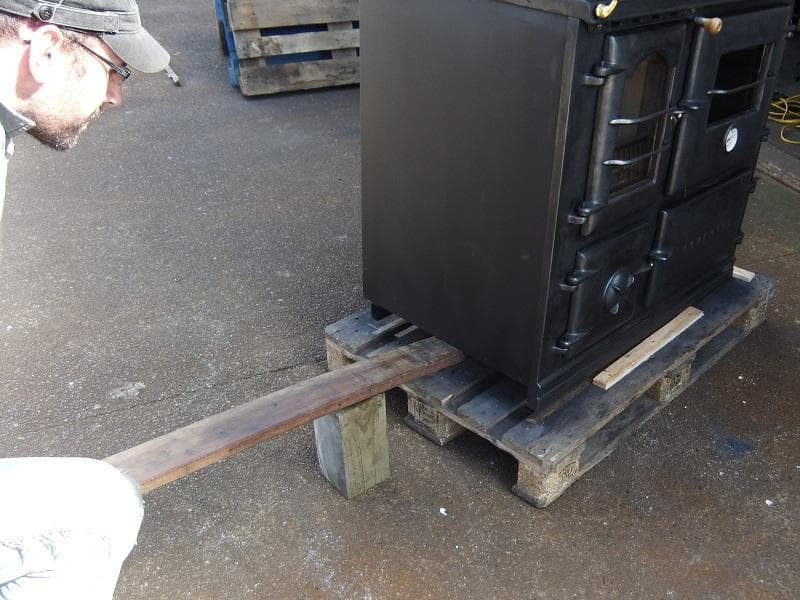
The further you push your lever under the stove, the more work you will have to do when then trying to lift it up. If needed, use a fulcrum to lighten the load. A fulcrum is a suitably-solid block that you sit your lever on, and push your lever down over like a seesaw, lifting the stove indirectly in that manner. The further your fulcrum is from the point of lifting, the more work you have to do, so keep it as close as possible to the stove.
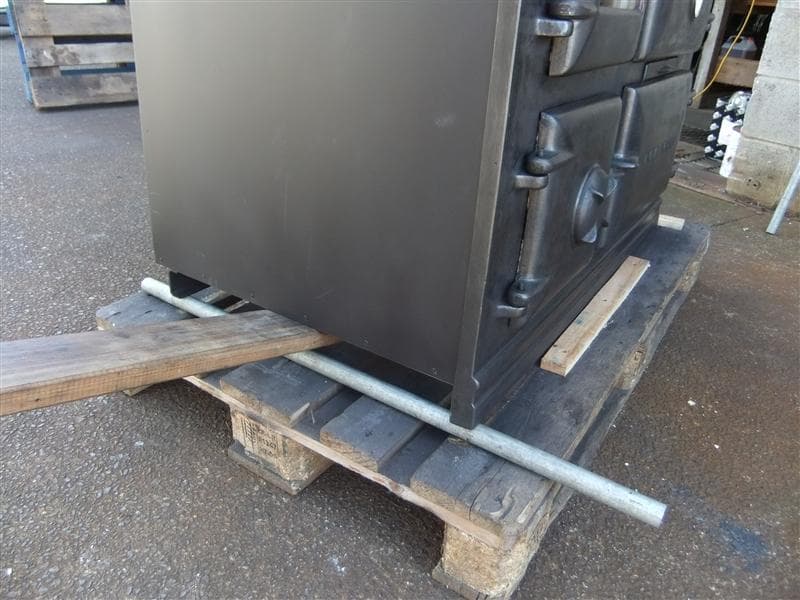
Rollers
¾” galvanised pipe (water pipe) makes an ideal roller. At least 800 mm long (width of the pallet). 3 or more is good – you can get away with just 2 in a pinch, but you will have to be constantly returning them to the front. I’m not entirely sure where to tell you to get them from, if you don’t happen to have pipe laying about. A plumbing outlet may have offcuts, or try a demolition yard or scrap metal outfit? We have some, but we’re in pretty short supply and reluctant to part with the few we do have.
People
One person is doable but not recommended (David has ramped a 400 kg Heritage up onto his ute before, alone, using nothing but a lever, some rollers, and wedges to stop it rolling backward for safety, but not a sensible thing to attempt), and three or more is fine, but fairly redundant most of the time. Two people allows one for levering and pushing, and one for adjusting rollers. Strength isn’t super critical – it is more important to have someone who knows what they are doing, and who appreciates the power of the lever.
Ramp
Where you have differing elevations to navigate (ie: down from a trailer/onto a deck/up steps/over a ledge and so on) you will need to set up a ramp. Just two sturdy planks should do it, with blocks of wood or other strong materials stacked in intervals beneath for support; a sheet of thick strong ply even better. A wedge or two is also advised: use as a chock on the downhill end of the pallet or stove for some protection against gravity. On steep ramps [not recommended] you would also need some kind of safety strapping to keep the stove under control.
Longer, shallower ramps are better, as they decrease the angle of incline (and therefore the effort involved going uphill, and the danger of the stove getting away from you going downhill), but the longer the ramp the sturdier your planks need to be, and the more frequently you will need to space supports underneath.
I’ve never heard of anyone collapsing their ramp – support it well, and don’t become the first!
Floor protection
Where you are going to be rolling over sensitive surfaces (ie: carpet, tiles, polished concrete or wooden floors) you will want to lay down some protective material. Scrap plywood is ideal if you have access to it, but you can make do with laying down some tracks of widely spaced parallel strips of timber (scrap pine or the like). Where you have long distances to traverse across floors that need protecting, reuse your floor protector in the same way you reuse rollers: as you move off one set of ply/timber track onto another, extend your track by moving the vacated set back to the front.
Planning and Preparation
Once you have collected everything you need, it’s time to work out your plan of attack and get set up: your ramp; the point at which you will abandon the pallet; the route you will take through your house; and the first stage of floor protection should all be considered and prepared in advance.
Realise that the stove will need to come off the pallet at some point: you get to decide where. This can actually be quite useful when you plan for it – you can use the pallet to your advantage by bringing it right up to a ramp and so reducing the distance that the stove has to climb, or where you have only a single step or ledge to navigate: in those cases you may be able to do away with needing a ramp altogether by rolling the pallet up to the ledge, transferring the rollers from beneath the pallet to under the stove, and then rolling the stove forward over the ledge and on to a waiting roller at the new height, leaving the pallet behind. As noted at the beginning, if you are moving a Homewood Companion, you will want to leave it on the pallet until its final location: the Companion is unsuitable for rolling, so the pallet gives you something to lever up and roll.
The initial leg of your lever-and-rolling journey is generally the trickiest as it almost always involves differing elevations and the use of a ramp. Once you’re on the level it’s all plain sailing.
Set your ramp up if needed, and support it well. Setup a floor protector where needed.
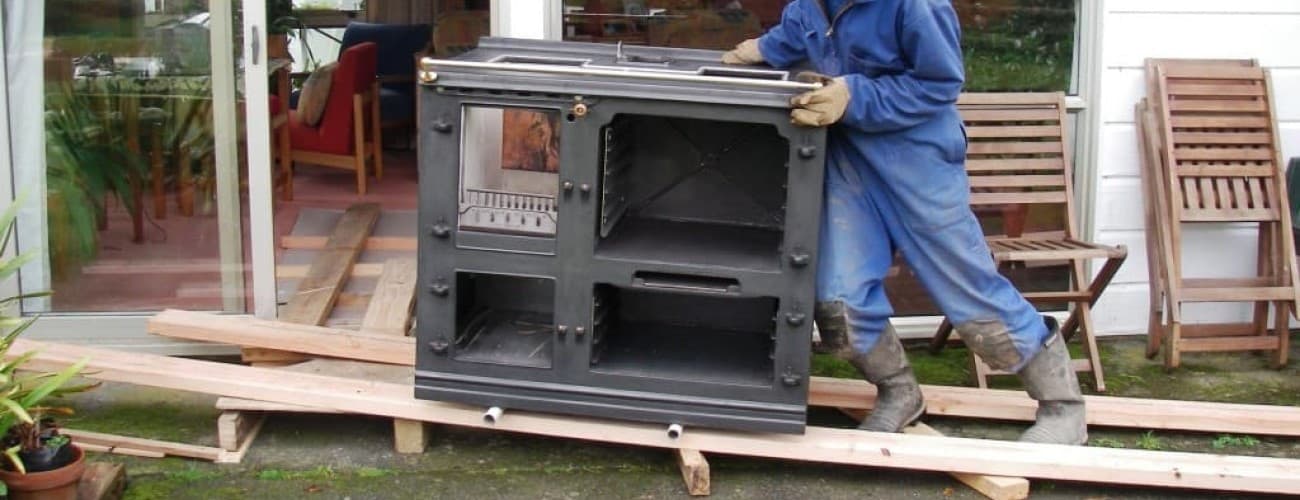
Putting the plan into action
You’re now ready to begin, so unwrap the stove (if not already), cutting the straps holding it onto the pallet (don’t worry, it’s not going anywhere), and remove all the doors to reduce your weight. They’re simple to take off – just lift them up over the hinge pins. Go place them somewhere safe well out of the way (lay an old sheet or newspaper – they will likely leave polish behind). Take extra care with the oven door not to put any pressure on the thermometer probe. You can do the same with the cooking plates if you like, just to remove even more weight. Remove trays, racks, ash pan and anything else that is not fixed in place.
Get your first roller underneath and start pushing the stove forward, as described at the beginning of this section. Once you get to your ramp things start getting interesting. Unless you plan to use the pallet to overcome a step further ahead (or are moving a Companion), now is the time to leave it behind.

Down, down, down
Going down, the top of the pallet will be higher than the top of your ramp when flush against it, so just push the stove forward, out beyond the pallet, and over and on to the ramp. You’re unable to lead with a roller here (it would just roll down the ramp before the weight of the stove is on it) so keep pushing the stove off of the rollers on the pallet. As you reach the tipping point, slow right down, and let the stove lower on to the ramp. Be aware that the roller it’s leaving behind may quite suddenly shoot out backwards as the direction of the weight shifts.
Once on and with a bit of pushing (gravity being on your side), the stove may slowly slide down the ramp without need for any rollers. If that’s not the case, and it most likely won’t be, you’re going to need to lever up the leading end of the stove, and very carefully add a single roller to the front edge. Be very aware that this is the point the stove may want to shoot forward – luckily you came prepared. The person with the lever should maintain upward levering pressure, acting as a partial wedge, so the full weight of the stove is not on the roller: this will slow it down enormously, and should allow you to stop it dead without needing to exert much more upward force: if it’s anything more than a gentle decline, chock the stove (or pallet if keeping on) with wedges to take the weight in stages. If it is a steep ramp [not recommended] you will want some kind of strapping restraining it for safety. The person sliding the roller under should switch to “slow down” duty as soon as the roller is in place – pushing against the stove with their body weight. In this controlled fashion, allow the stove to reach the bottom of your ramp.
At the bottom, your stove will come to a complete stop, or may continue to roll across the floor for a bit if your ramp had a very shallow angle. To get the stove fully off the ramp and onto the level, just keep levering up the front and moving the roller right forward. It will slide off the roller pretty quickly while doing this, so you’ll need to be levering up and adjusting the roller fairly frequently before you reach level ground. The person doing the roller adjustments may be able to encourage the roller forward with the stove/pallet to a degree, and save a bit of levering.
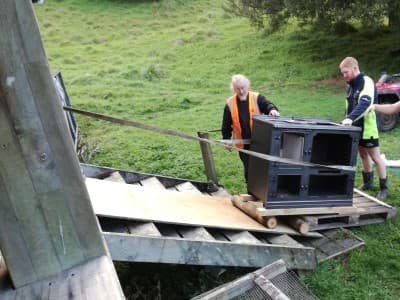
Up, up, up
You have much more control going up a ramp, but are going to have to work a fair bit more too, as the relentless force of gravity is against you. Get your pallet hard against the bottom of your ramp, and switch out the rollers so you have one roller under the leading end of the stove. For the first part you will be having to frequently lever up the front to adjust your roller forward, because as you push or lever the stove forward you’ll quickly lose the roller to that dead space between the front of the stove up on the ramp and the back of the stove down on the pallet. Persevere until you have the stove right off the pallet, sitting on the ramp with a roller beneath the front of it.
From there, lever and push the back of the stove in increments, levering it up the ramp, with someone on “slow down” duty helping to push it up and to prevent it coming backwards: again, a chocking wedge would be a sensible idea. If you ever feel like the stove is wanting to roll backwards, lower the back end down onto your wedge, and adjust the roller right back to the front of the leading end before continuing. Again, if it is a steep ramp [not recommended] you will want some kind of strapping restraining it for safety.
At the top of the ramp, lay a roller on the flat surface for the stove to be lowered onto. Continue levering the stove upward – as it runs out of ramp to climb it will reach tipping point, so allow it to gently tip down onto the surface/roller at the top of the ramp in a controlled manner.
A final caution about steepness: the shallower you make your ramp, the more controlled this whole exercise can be! Unless extremely shallow (like the nice one pictured here!), never use two rollers under when going either up or down, as this just invites gravity to completely take over, and where your ramp is steep you will need to take extra safety precautions (well secured trucker strap restraining, or similar).
Smooth waters
On the level, things are comparatively easy – just keep replacing the front roller with the back roller, and push.

Turning corners is simple enough where needed: you can spin the stove on a single centrally-located roller by pushing on it sideways at the ends, and can lay down the advance rollers at angles to encourage it to turn as well.
Push it all the way to your installation spot, and get it sitting lined up with, but out in front of, the final position.
[Where you have room on one side or other of the installation location, and are not needing to worry about the plumbing connections or anything, you may be able to actually roll it in this fashion all the way onto the ash hearth from the side and into the final position, in which case you can skip the next section: just lever up to remove the last roller, then adjust with lever until happy with the position]
Final Positioning
You have a few things to consider here: your hearth, your water jacket pipes, and your surround (brick, block, etc). This all assumes that all preparatory work has already been done, in terms of shielding any combustible walls, if required, as laid out in our Installation Specifications.
Hearth
Your hearth really should have been a part of your pre-arrival preparation work, and so at this point already be laid: if not, hold off moving your stove right close until it has been, and get that sorted now.
The most ideal situation is that you have your floor all down, and your hearth is recessed in, level with it as we recommend in our install specs. This way you can just extend your floor protection over the heath as well, remove rollers from beneath the stove, push the stove directly back over the hearth and off the floor protection into the final position (more on that later).
Less ideal is for your floor to have not yet be laid (eg: new, in-progress kitchen), so your hearth will be sticking up from what’s currently there. Not too much of a problem, as we can get around it easily enough: just put down some extra ply/floor protection so you end up at the same level as the hearth, and do as above.
Least ideal is that your floor is down and your hearth is down too, but wasn’t recessed in to the floor. We can get around this in exactly the same way we got around the floor not being laid, but the end result leaves a hearth sticking up above your floor with doesn’t look the best, interferes with sweeping, can stub toes, and perhaps most importantly leaves you with a little ledge in a working area around which you are likely to be carrying lots of nice hot food in the future!
What you don’t want at all is to be pushing the stove in, then laying a hearth that’s not recessed and so sits both above the level of the floor and up against the front of the stove – it’s a totally avoidable situation, looks bad and creates problems for you should you ever want to slide your stove out. Just don’t do it.
As the ash hearth only needs to extend in front of the stove (by at least 300 mm) in the case of the Homewood Heritage, Homewood Matriarch and Homewood Companion without legs, you have a few options for what you’re going to be permanently sitting your stove on, beyond and level with the hearth. You can just run your hearth right to the back (this is what you must do if it is a Companion on legs), and simply sit the stove on that – or seeing as those are tiles that will never be seen: run plain, cheaper tiles of the same thickness right back instead.
Alternatively, and often better, you can just put it on three steel strips (flatbar of the appropriate thickness) that end flush at the same height as the hearth tiles. Run these front to back: one in the middle and the other two near the edges. This option is probably going to be cheaper still, functions just the same, and won’t even be noticeable (provided you allow your hearth enough width so that when the stove is right back it still sits on about 5 mm of hearth tiles at the front). It will be really easy to slide the stove back on these strips too; you can even grease them up in preparation.
Your hearth doesn’t have to be tiles, of course; it can be any heat resistant material of the size specified in our installation info – but tiles look nice.
Plumbing connections
Assuming your Homewood is going to connect to your hot water system, it will have water jacket pipe connections. With side pipes you’re fine at this stage, as you’ll not be planning to run them straight through the wall behind, so will have other plans all under control.
However, if you did opt for a stove with back pipe connections that you intend to have penetrate the wall behind, now (while the stove is off rollers, sitting at the same level as the hearth and lined up with the final resting spot) is a good time to involve your plumber.
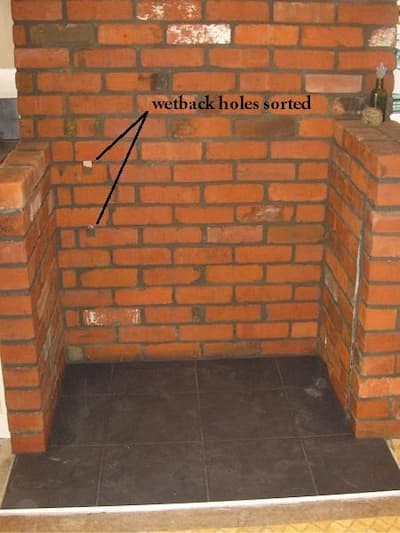
Get him to drill the holes for the pipes through the wall (and any brickwork/shielding/etc) while the stove sits out in front. This way he can confirm measurements, visually line them up, make any required adjustments, and drill. If the stove is being pushed right back to the point where the plumber isn’t going to have access to the pipe connections at the rear of the stove, this is when he will want to fit on extensions to our fittings; extensions that will go through the wall behind and give him something to work with out the other side of the wall (or in the wall, with an access panel on the other side) once the stove gets shoved back. If the stove is going to be left forward of the wall or shielding to allow plumbing access, you’ll need to leave an access gap of at least 100 mm.
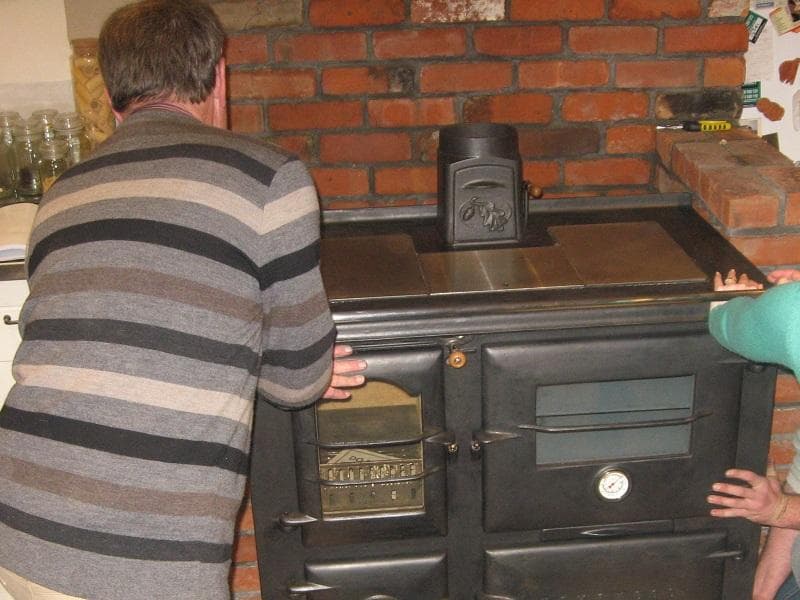
Pushing it back isn’t too difficult, but may involve a bit of extra muscle as you’re unable to make use of your trusty rollers and can’t really use levering any more either if it’s going into a tight fit. Lying on the floor, and pushing with your legs can help! For the Homewood Matriarch, if you lack enough people to budge it once off rollers, you could use a car jack or similar, pressing off of something solid to slide it backward into place.
Pro tip: don’t make the mistake of sliding the stove back into a pre-bricked setting on something that isn’t going to stay underneath – you’re going to have an extremely hard time lifting the 400 kg stove if you don’t have lever access! This is where running steel strips instead of tiling beneath the stove’s install location works really well: smooth to run in on, and intended to be left below there permanently.
Surround
Where your installation is going to be “built in”, ie: bricked, blocked and so on, we suggest it’s best for all that to be done first (leaving plenty of clearance: at least +5 mm each side), then get your stove from us, and do all of the above.
Brickwork makes a mess, and your stove will definitely be dirtied, and potentially damaged, when work takes place around and on it. It’s important that you have a little clearance anyway (which would be the only advantage to bricking around after it’s in place: getting as close a finish as possible) – 1 mm is the absolute minimum allowed, but you really should leave more than for expansion when hot, and in case your stove ever needs to be moved. It will also make it easier for the brickie to work, without needing to get around the stove and pipework.
The only brickwork we’d be comfortable taking place after the stove is in position is capping off any access clearances you may have left for the plumber and rear wetback connections (but extensions and doing it all on the other side of the wall is definitely better where possible), or maybe doing final brickwork up just one side.
Finishing up
Well, that’s it – your stove is in place, your plumber can be connecting the water jacket and the flue can be put in. Read your Operating Manual and enjoy the stove!
Other Considerations
“I have my stove sitting here, but I’m not ready to install it for another few weeks/months/years. What do I do with it in the meantime?”
It’s best to avoid that situation in the first place: don’t order until you’re closer than years to be ready for it, and if your plans are delayed after ordering, get us to hold the stove for you here. We’re always happy to look after them as long as needed – and if it turns into a situation where we need to store it for you long term we rotate out “your” stove with each new batch we produce. Getting us to store also allows us to give it it’s full shipping check off prior to sending out, and your warranty only begins from shipping date, not purchase date. And perhaps most importantly, if we end up storing your stove for you much longer than originally anticipated, we just rotate out “your” stove with each new batch, so no stove at all stays in long term storage!
If an unanticipated delay occurs after you’ve got your stove, do the following: remove the plastic wrap (as above, the wrap can become a moisture and condensation trap), read your manual, and put your stove in a secure and dry location where it is unlikely to be used as shelving – throw an old sheet/blanket over to protect it from dust. If it’s going to be like that for a really long time, make sure you check up on it periodically: there may be superficial surface rust or moisture cropping up that you can just wipe away with turps on a rag.
Stoves deteriorate quickest when not in use (eg: in storage), so get yours installed and put to good use as soon as possible. The happiest stove is a hot stove!
“What about receiving offshore/overseas/etc?”
For those of you out on islands off the mainland (or from another country altogether) – we are happy to arrange for the delivery of your stove to any ferry terminal/depot/freight agent that you nominate, and depending on the location, sometimes Mainfreight can actually still offer delivery-to-door (believe they can with Waiheke Island anyway, not 100% about Great Barrier actually): just let me your situation when ordering and we’ll help you out. International customers outside of New Zealand see here for a comprehensive article on what to expect.
“All this sounds like an awful lot of work, can’t you do it for us?”
Moving your stove really is a straightforward thing – it just requires a bit of forethought and planning. You’ve probably expended more effort in reading this article (seriously: I apologise for how long it is, in the future this will hopefully be replaced with just a 5 minute video!). The actual moving shouldn’t take more than half an hour or so, and you only need to do it once.
If you really don’t want to do any of it at all you could always pay an installer to do the moving too.
For you Whangarei locals – we are happy to lend you our gear overnight (levers/rollers/pallet trolley/ramp gear) if you’re collecting the stove from our workshop, but we no longer offer any delivery service ourselves.
“What do I do where I have neither truck nor trailer/ute access??”

– Zak, April 2011 (minor updates, 2020)